The bones of the bonnet (or hood for our American friends) are now in place and it finally looks like a car. The bonnet looks much longer than i was expecting which is a good thing and I am really rather pleased with the overall look.
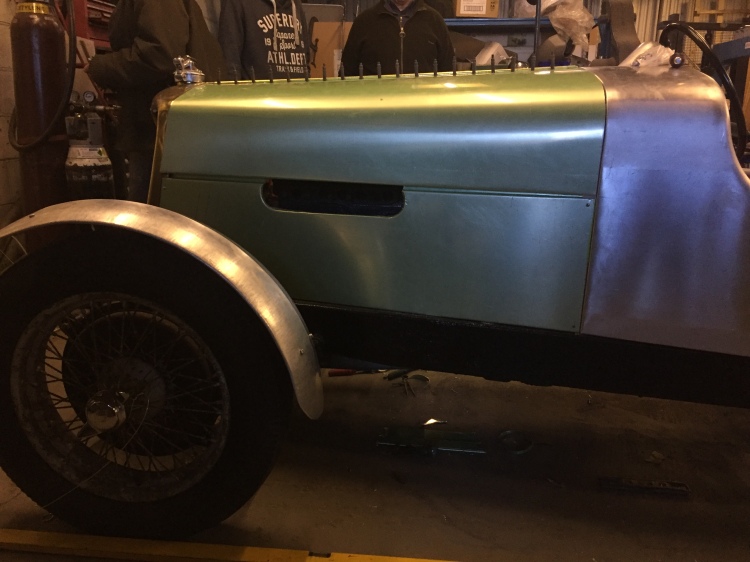
On the passenger side above the chassis, there is a fixed panel that fits beneath and slightly around where the exhaust manifold will exit the side of the car. The bonnet overall is center hinged so on that side, the bonnet closes down onto the top of the panel slightly above the exhaust, you can see the exhaust opening quite clearly in the picture below. The green colour is created by the protective film over the aluminum sheet and will of course be removed. The lower panel will have a long row of louvers cut into it to allow hot air to escape out of the bonnet area. The final 300mm or so of the bonnet is 0the passenger foot-well so that area will not have any louvers in an attempt to limit rain water being blown onto your feet.
Along the top of the bonnet you can see a row of vertical pins. These are temporary clips designed by the aircraft industry to hold metal panels in place during the construction phase and are holding the panel to a big brass hinge. They will be removed and replaced with some nice brass rivets.
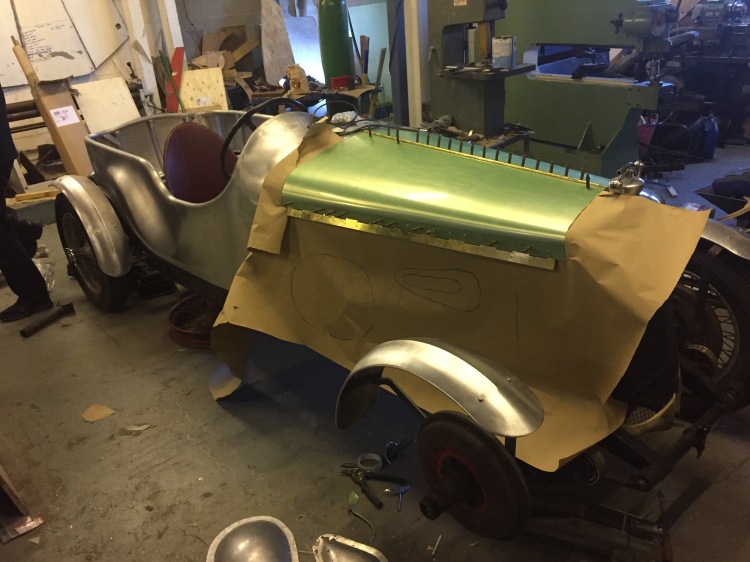
The drivers side of the bonnet is effectively double hinged. It uses the same central hinge as the passenger side but it also has a hinge part way down the side that enables it to fold up against itself. In the picture below the lower part is not yet fitted as we were mocking up where the various bulges need to be to accommodate protuberances.
- The large oval on the left needs to be there to give sufficient space for the drivers foot to operate the throttle. The car is narrower without the overhanging saloon bodywork so the pedal is hard up against the side of the bonnet and is also quite close to the brake pedal. This is not a car for anyone with big feet or wide shoes! The bulge simply creates space for your right foot to operate the pedal through its range of movement.
- Moving forwards, the double oval is where the 2 carburetors are. The front carburetor would be hard up against the side of the bonnet so it needs space to allow an equal airflow. This bulge will have an opening at the front to let cold air flow directly to the carburetors. To the right of this bulge will be 3 louvers cut facing forwards to let more cold air in. A common feature in vintage race cars
- Below the carburetor bulge will be a row of louvers to let hot air OUT of the bonnet area
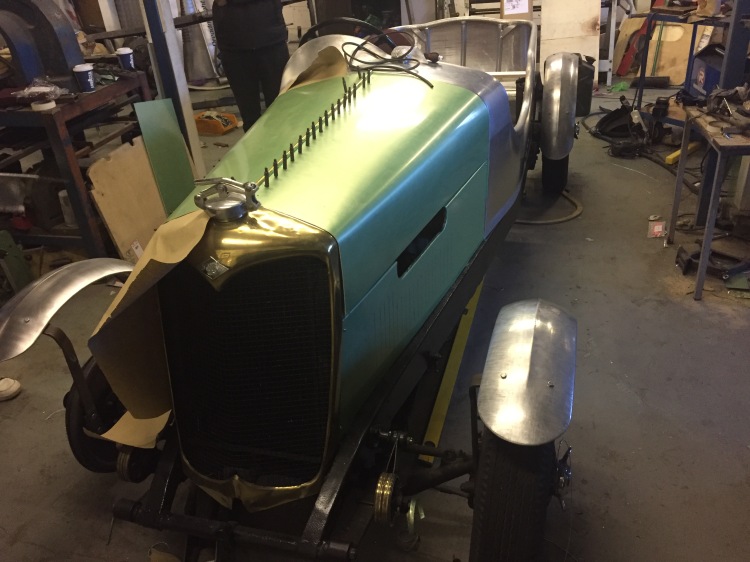
Below you get a better view of the central hinge. There will be a row of louvers along each side of it, the primary function of those particular louvers is of course to allow the escape of hot air, but it is more for the aesthetics – i.e. it is more sporty.
In the photo also visible is another of my design features – the rear bonnet curve has a wider radius than the front. The Riley saloon cars had that front tight radius all the way to the back which made the bonnet flat on the top and somehow more square looking. I wanted graceful curves everywhere but naturally I still had to match the shape of the radiator hence the transition from small radius to wide. I think the Artisans have accommodated my request rather well – its a very smooth transition.
There was not enough room in the workshop to take a photo but when viewed from the side, the car looks nicely proportioned, looks as it should and is very definitely a sporting four seater. In a week or so the construction work should be complete only requiring the finishing of panel fit, smoothing edges etc – then its back home for the rest of the build. The blog will slow down at that point whilst i save up money for the parts…
